How to Launch a Digital Product Business in 10 Steps
A practical 10-step roadmap to validate, build, price, launch, and scale digital products with MVPs and smart marketing.
How to Launch a Digital Product Business in 10 Steps
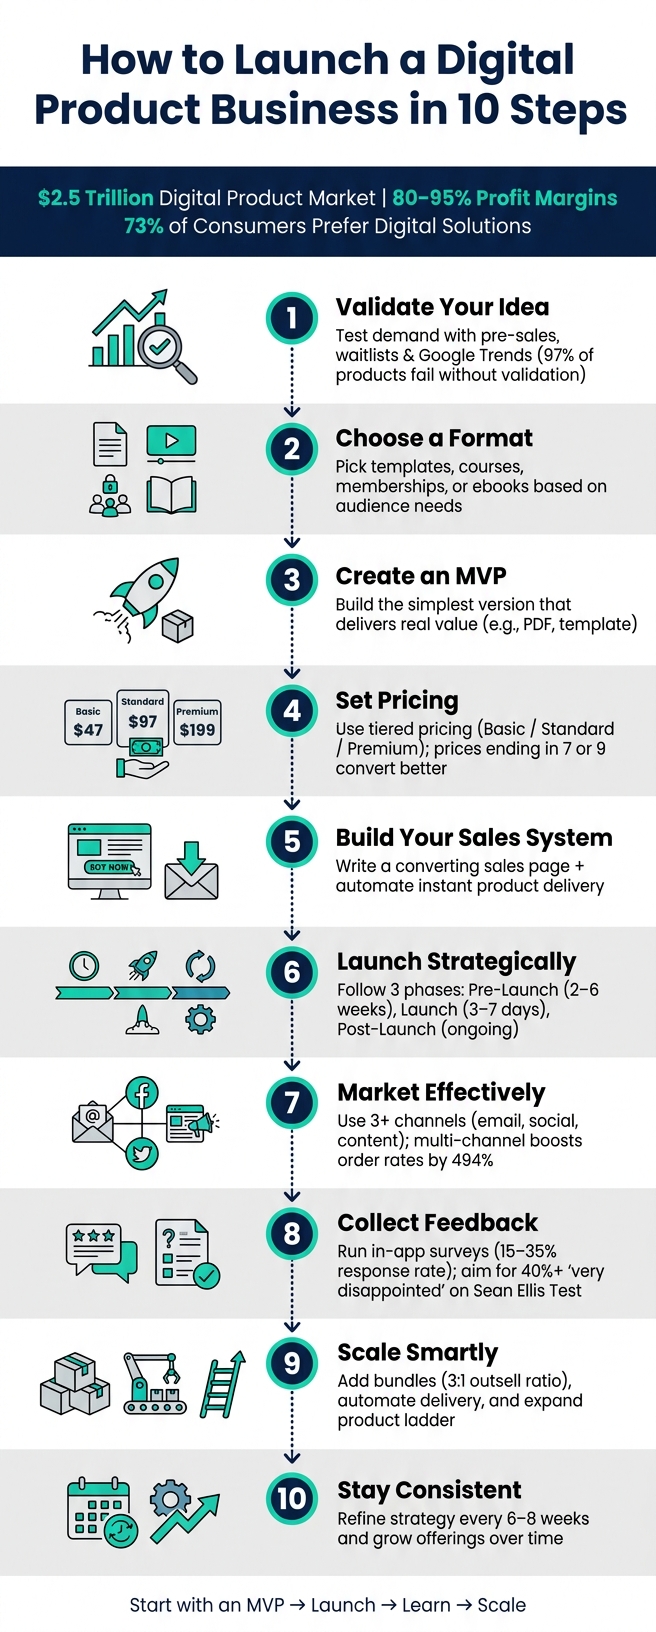
Launching a digital product business can be a highly profitable venture. With profit margins often between 80%–95% and a growing $2.5 trillion market, selling items like ebooks, templates, or online courses offers scalable opportunities. Here's a quick roadmap to get started:
- Validate Your Idea: Test demand using pre-sales or waitlists. Tools like Google Trends and Reddit can help spot market gaps.
- Choose a Format: Decide between templates, courses, or memberships based on your audience’s needs.
- Create an MVP: Start simple - like a PDF or template - and refine based on feedback.
- Set Pricing: Use tiered pricing to cater to different budgets and maximize revenue.
- Build Your Sales System: Craft a compelling sales page and automate product delivery.
- Launch Strategically: Use a phased approach - pre-launch, launch, and post-launch - to build momentum.
- Market Effectively: Leverage email, social media, and content repurposing to drive sales.
- Collect Feedback: Continuously improve your product by listening to your customers.
- Scale Smartly: Add new products, bundles, and automate repetitive tasks.
- Stay Consistent: Regularly refine your strategy and expand your offerings.
Key Insight: Start small with a Minimum Viable Product (MVP) and focus on solving a specific problem for a specific audience. Use tools like myAtlasLab to simplify content creation and save time. The digital product market is booming - take the first step today.
How to Launch a Digital Product Business in 10 Steps
How to Sell Digital Products in 2026 (A Beginner's Guide)
sbb-itb-e9b8513
Step 1: Validate Your Product Idea
Before diving into development, you need to confirm that people actually want what you're offering. Here’s why: 97% of digital products fail because creators skip validation. Many spend weeks or months building something, only to launch it and get no response. Early validation can save you from investing time and energy into a product that won’t sell.
Start by narrowing down your idea. Broad concepts like "a productivity course" often fail to connect with buyers. Instead, focus on specifics - something like "a time-blocking template for freelance designers" resonates better because it feels tailor-made for a particular audience. Try summarizing your product in one sentence: "[Product type] for [specific audience] that [solves specific problem]." If you struggle to fit it into one sentence, your idea might still be too vague.
"The market doesn't reward the best product. It rewards the best-understood market." - Angelina Mihaylov
Mining 3-star reviews is a brilliant but underused tactic. Look at competitors on platforms like Udemy, Etsy, or Amazon. Three-star reviews often highlight what’s missing or could be improved (e.g., "Great concept but the templates weren’t editable"). These gaps can reveal opportunities for your product. Similarly, check Reddit threads for phrases like "I wish there was a..." or "Does anyone know of a resource that..." to uncover real pain points directly from your audience.
Use AI Tools for Market Research
AI tools can speed up market research significantly. Start with Google Trends to see if interest in your niche has been growing or declining over the past year. Then, use tools like Google Keyword Planner or Ubersuggest to check monthly search volumes. If a problem-related keyword pulls in 1,000+ monthly searches, it’s a strong indicator of demand. Another helpful tool, AnswerThePublic, maps out the specific questions your audience is already asking online. These insights can shape your product’s content and messaging.
For example, in March 2026, a creator noticed that "AI recruiting tools" had 8,100 monthly searches. They validated a product idea - AI Workflow Templates for Recruiters - by creating a simple landing page and promoting it through two Reddit posts and three LinkedIn comments. Within 36 hours, they had 89 email sign-ups, which gave them the confidence to proceed. Five weeks later, the product launched at $49, generating $7,800 in its first month.
Leverage these tools to run quick tests and gauge demand before committing to full development.
Test Demand with Pre-Sales or Waitlists
The most reliable validation isn’t a compliment - it’s a commitment. Whether it’s an email sign-up or a pre-order, people taking action before your product exists is concrete proof of interest.
One effective method is the "Fake Door" test: create a single-page site with a "Join Waitlist" or "Pre-order" button. If 10% or more of cold visitors sign up for your email list, or 2% or more commit to pre-orders, you’ve got a validated idea.
In early 2026, a graphic designer tested her "Brand in a Box" identity kit this way. She used a Reddit post and an Instagram story to drive 200 visitors to her page. Within 48 hours, 47 people signed up, proving there was enough interest to move forward.
Platforms like Carrd make it easy to create these pages in under an hour. This approach is quick, inexpensive, and gives you a clear signal on whether to proceed or pivot.
Step 2: Choose Your Product Format and Offer
Once you've confirmed demand for your idea, it's time to decide on a product format that directly meets your customers' needs. The format you select affects everything - how quickly you can create it, what you can charge, and how easily your audience can use it. This choice lays the groundwork for crafting an offer that resonates with your target audience.
Match Your Format to Customer Needs
Your product format should deliver results clearly and efficiently. A quick guideline: if you’re offering a repeatable system, an online course might work best. If your goal is to save time for your audience, templates or toolkits could be the way to go.
Here’s a simple formula to frame your product: [Audience] achieves [Result] in [Time]. For instance, a Notion dashboard tailored for freelance copywriters to manage client projects is far more appealing than a generic dashboard.
| Format | Best When… | Typical Price Range |
|---|---|---|
| Templates/Toolkits | Buyers want to save time or skip tedious tasks | $15 – $97 |
| Online Courses | Buyers seek structured learning or transformation | $47 – $997+ |
| Memberships | Buyers value ongoing support or community | $19 – $99/mo |
| Ebooks & PDF Guides | Buyers need a quick-start reference or overview | $9 – $49 |
If you’re new to product creation, start simple. A polished PDF or a single template can validate demand in just a few days, while building a full course may take months.
Build Pricing Tiers and Add Bonuses
After deciding on your format, structure your offer to cater to different budgets. A three-tier pricing model - Basic, Standard, and Premium - works particularly well. The Standard tier should be your focus; it’s the middle option that often feels “just right” to buyers. The Premium tier, on the other hand, serves to make the Standard option look even more attractive. This strategy, known as the decoy effect, has been shown to increase the average order value from $47 to $89. Additionally, prices ending in 7 or 9 (e.g., $47 or $97) often convert better than round numbers in testing.
Adding bonuses is another great way to increase perceived value without significant extra effort. A short video tutorial, a swipe file, or a checklist can make your offer feel more comprehensive. You can also include an order bump at checkout - a small, one-click add-on like a $27 workbook paired with a $97 course. This simple addition can increase your average order value by 15–30% without requiring extra traffic.
"Pricing is the single highest-leverage decision in your digital product business. Get it right, and every sale is more profitable, every marketing dollar works harder, and your business grows faster." - Dani, GM of SendOwl
When setting your price, focus on the value your product provides, not the time it took you to create it. For example, a spreadsheet that saves someone 40 hours of work is worth $97, even if you only spent a weekend creating it. Use these pricing strategies to refine your product and maximize its appeal.
Step 3: Build a Simple Product Strategy
Once you've refined your format and offer, the next step is crafting a strategy that naturally guides customers through your product lineup. This approach builds on your validated idea and refined offer, creating a product ecosystem that steadily moves customers from curiosity to commitment. Picture it like a ladder - each step builds trust and funds the journey to the next level.
An effective structure typically includes four tiers:
- Lead Magnet: This is a free, focused resource - a checklist, mini-template, or swipe file - that grabs email addresses and gives potential customers a preview of your expertise.
- Entry Product ($17–$97): A low-cost, low-risk offer designed to quickly turn subscribers into paying customers. Often referred to as a "tripwire."
- Flagship Product ($197–$997): Your primary revenue generator. This could be a detailed course, a toolkit, or a system that provides a meaningful transformation.
- Premium Offer ($1,000+): High-ticket options like coaching, mastermind groups, or enterprise-level access for your most dedicated customers.
Make sure your lead magnet aligns with your entry product, and that your entry product naturally leads into your flagship offer. When every tier solves a specific problem and seamlessly points to the next, customers progress through your ecosystem without feeling pressured.
Set Measurable Goals
To track progress, define success with clear, specific metrics. Start with one primary goal (e.g., total revenue) and two supporting metrics (e.g., email subscribers, conversion rate). This helps you focus on what drives actual results instead of chasing vanity metrics like traffic that don’t translate into sales.
Here’s a simplified way to set goals: If your target is $50,000 in your first year selling a $197 flagship product, you’ll need about 255 sales. With a 2% conversion rate, that means driving approximately 12,750 visitors to your sales page. Breaking it down like this transforms an abstract goal into actionable traffic and marketing targets.
Once your goals are clear, map them onto a structured launch timeline to ensure you stay on track.
Use AI Tools to Plan Your Launch
A 90-day launch plan, divided into three phases, can keep your efforts organized:
- Days 1–30: Focus on validating your niche and building a minimum viable product (MVP).
- Days 31–60: Shift to creating your sales page, checkout process, and email sequences.
- Days 61–90: Emphasize distribution through content, partnerships, and evergreen funnels.
AI tools can significantly simplify this process. For instance, you can use an AI assistant to create a structured 90-day content calendar, outline your product modules, or draft email nurture sequences in minutes rather than days. The table below highlights priorities during each phase:
| Phase | Focus | Key Metrics to Watch |
|---|---|---|
| Days 1–30 (Validate) | Proof of demand, MVP creation | Waitlist signups, pre-sale revenue |
| Days 31–60 (Build) | Sales page, checkout, email sequences | Conversion rate (CVR), checkout friction |
| Days 61–90 (Sell) | Content, traffic, partnerships | Revenue per visitor (RPV), email click rates |
| Post-90 Days (Scale) | Evergreen funnels, new products | Lifetime value (LTV), ROAS |
"Launch day is not the starting line. It is the finish line of your pre-launch work." - Michael Raven, Blazon Agency
With a clear strategy in place, you're now ready to focus on creating a minimum viable product.
Step 4: Create Your Minimum Viable Product (MVP)
Once you've nailed down your strategy and validated your idea, it's time to bring your product to life with an MVP. The good news? You don’t need a polished, final product to start selling.
An MVP, or Minimum Viable Product, is essentially the simplest version of your product that still delivers real value. Eric Ries, author of The Lean Startup, describes it as:
"The version of a new product which allows a team to collect the maximum amount of validated learning about customers with the least effort."
For digital products, this means focusing on one specific problem for one specific audience. It could be as simple as a 10-page PDF checklist, a single Notion template, or a short video tutorial. The goal isn’t to create something perfect - it’s to prove that your product works and offers value.
If you find it hard to sum up your MVP in one sentence - like, "It helps [audience] do [X]" - you might need to narrow your focus. Cut back on features until the core benefit is crystal clear. Then, use tools like AI and pre-designed templates to streamline the creation process.
Use AI and Templates to Speed Things Up
AI and templates can be game-changers for quickly building your MVP. Take Travis Nicholson, for example - he used AI to create structured outlines and Canva templates, which helped him churn out over 20 digital products. This approach earned him more than $27,000 on Gumroad in May 2026.
You can apply a similar strategy. Start by prompting an AI assistant with a detailed request, such as:
"Write a complete [product type] on [topic] for [audience]. Make it practical, beginner-friendly, and structured with clear sections."
Once you’ve got the content, drop it into a pre-designed template, tweak the branding, and your MVP is almost ready to go. With this method, you could realistically spend one day creating the content and another day finalizing the design. Plus, by using no-code tools and templates, you can cut development costs by as much as 85% compared to building something from scratch.
"AI is your co-creator, not your ghostwriter. Unedited AI content is detectable, generic, and lacks the personal credibility that makes buyers trust you." - Financial Binder
Format and Deliver Your Product
Once your MVP is ready, choose a format that’s easy for your audience to use. For example:
- PDFs are ideal for guides and ebooks since they work on almost any device.
- MP4 files are great for video lessons, and even a basic screen-share recording can work for your first version.
- Templates should be delivered in the platform your audience already uses, like Notion, Google Sheets, or Canva.
Make sure to include a short "how-to-use" guide and an example with every download. This simple step can help reduce confusion and cut down on support requests.
When it comes to delivery, use a platform that offers instant access to your buyers. Delays in getting the product can frustrate customers and hurt their trust in your brand. Set up a basic three-email sequence after purchase: one for delivery confirmation, another with a usage tip on Day 3, and a feedback request on Day 7. This keeps your buyers engaged and helps you gather valuable input for version 2.0.
"Launch with a Minimum Viable Product, then improve based on customer feedback. Your version 1.0 doesn't need to be perfect - it needs to exist." - EarnifyHub Product Team
Step 5: Price Your Product and Set Up Payments
Now that you’ve validated your MVP, it’s time to focus on pricing and setting up payments. These decisions directly impact your revenue and how smoothly customers can make purchases.
Choose a Pricing Model That Fits Your Product
Did you know that 67% of creators undervalue their products by 30–50% compared to what buyers are willing to pay? Instead of starting from scratch, use the pricing structure you’ve already outlined. Conversion data can help fine-tune your price. For example, if your sales page conversion rate exceeds 5%, it might be a sign that your product is priced too low.
"Pricing is the single highest-leverage decision in your digital product business. Get it right, and every sale is more profitable... Get it wrong by pricing too low, and you grind through hundreds of transactions without building anything sustainable." - Dani, GM of SendOwl
Here’s a breakdown of the main pricing tiers for digital products and what to keep in mind for each:
| Pricing Tier | Price Range | Best For | Watch Out For |
|---|---|---|---|
| Low-Ticket | $5–$50 | Impulse buys, first-time customers, audience building | Requires high volume; low profit margins |
| Mid-Ticket | $50–$500 | Primary revenue driver; attracts committed buyers | Needs a strong sales page and trust |
| High-Ticket | $500+ | Courses, coaching, or complete systems | Demands significant social proof and active selling |
Once your pricing is nailed down, the next step is setting up a payment system that aligns with your strategy.
Set Up a Payment System
A reliable payment system is crucial for smooth transactions. If you’re based in the U.S., one of the first decisions is whether to use a Merchant of Record (MoR) platform or a direct payment processor.
Merchant of Record (MoR): Platforms like Lemon Squeezy (5% + $0.50 per transaction) automatically handle sales tax, which is especially helpful given the 2018 South Dakota v. Wayfair ruling. This decision requires sellers to collect sales tax in states where they exceed $100,000 in revenue or 200 transactions. With over 12,000 tax jurisdictions in the U.S., this can get complicated fast. Gumroad is another MoR option, but its flat 10% fee can add up as your revenue grows.
Direct Payment Processors: If you want to keep more of each sale and don’t mind managing taxes separately, Stripe (2.9% + $0.30 per transaction) and PayPal (2.99% + $0.49 per transaction) are excellent choices. They offer secure checkouts, fraud protection, and support for Apple Pay and Google Pay. However, be sure to test your checkout process first - extra form fields can reduce conversion rates by 10–15%.
Step 6: Build Your Sales System
Once you've set your pricing and payment options, the next step is creating a system that turns visitors into paying customers. This involves two key components: a sales page that persuades people to buy and an automated delivery system that ensures they get their product immediately after purchase.
Design a Sales Page That Converts
A strong sales page answers one question: Why should someone buy now? To do this effectively, use the PAS framework: start with the Problem, emphasize the cost of doing nothing, and then position your product as the Solution.
Your headline matters - make it specific and outcome-driven, and keep it under 60 characters. Avoid generic product names, as they tend to hurt conversions.
Here’s how to structure your page for maximum impact:
- Start with a bold H1 promise at the top.
- Follow it up with three to five bullet points focused on the results your product delivers.
- Place social proof, like testimonials or success stats, near the buy button. Testimonials work best when they’re specific, such as "added 4,200 subscribers in 60 days".
- Repeat your call-to-action (CTA) button at least three times: above the fold, after the benefits section, and again at the end of the page.
"The pages that sell best aren't clever; they have structure. The right headline, the right objection handling, the right proof, in the right order." - Linda Hwang, Marketing Advisor
Don’t overlook technical details. A slow-loading page or poor mobile design can kill sales. Aim for load times under 2.5 seconds (LCP) and ensure your page looks great on mobile devices. Use WebP images with compression to balance speed and image quality. Also, offer guest checkout - forcing account creation before purchase can reduce sales by 20–40%.
Once your sales page is optimized, you’re ready to focus on delivering the product smoothly.
Automate Product Delivery
A great sales page gets the sale, but the post-purchase experience seals the deal. Customers expect instant access to their purchase, and any delay could lead to refunds or chargebacks.
Make sure your payment processor integrates with an automated delivery system. As soon as payment clears, buyers should receive:
- An order confirmation email.
- A download link, ideally included directly on the "Thank You" page.
For security, use signed URLs that expire after a specified timeframe (e.g., 48 hours or three download attempts). Keep file sizes manageable - PDFs under 50MB work well for mobile users, while ZIP files are great for bundles.
To enhance the experience, set up a short automated email sequence. The first email delivers the product, while the next two or three emails can share quick tips, success stories, or even an upsell opportunity. Finally, test every step of the process - from the sales page to the checkout, delivery email, and download link - to ensure everything works smoothly.
Step 7: Launch and Market Your Product
Once your sales system is ready, it's time to focus on launching your product. A successful launch isn’t just a single event - it’s a carefully planned marketing effort that unfolds in stages to build momentum and convert interest into sales.
"The product gets people results. The launch gets people to buy the product." - Kajabi Blog
Three Phases of a Successful Launch
A well-structured launch follows a phased approach, starting with pre-launch activities and ending with post-launch analysis. Each phase plays a specific role in ensuring the product’s success.
- Pre-Launch (2–6 weeks): This is all about creating excitement and building a waitlist of 500–2,000 engaged members. Adding a VIP deposit (like $5) can significantly boost conversions. Since pre-launch efforts often account for 70–80% of the total launch workload, focus on nurturing your audience through email campaigns and other touchpoints.
- Launch (Open Cart, 3–7 days): Keep your cart open for a short window to create urgency. Use multi-channel promotions, send timely emails, and highlight social proof to encourage purchases. Interestingly, the final email in your sequence can drive 30–50% of your total launch revenue.
- Post-Launch (Ongoing): After closing the cart, evaluate your performance. Review metrics like conversion rates and revenue per visitor over 1–2 weeks to determine if your product is ready for an evergreen sales funnel.
| Launch Phase | Duration | Key Activities |
|---|---|---|
| Pre-Launch | 2–6 weeks | Build a waitlist, collect VIP deposits, nurture leads |
| Launch | 3–7 days | Multi-channel promotion, urgency emails, social proof |
| Post-Launch | Ongoing | Analyze data, optimize onboarding, plan evergreen sales |
Diversify Your Marketing Channels
Relying on just one channel limits your reach. Using three or more marketing channels - like email, social media, and paid ads - can increase order rates by up to 494% compared to single-channel campaigns. Among these, email is the most effective. Even a small, warm email list of 50–200 contacts can outperform other methods when paired with a structured sequence that builds interest and urgency.
For social media, adapt your strategy to your audience. For example, Twitter (or X) is great for public engagement, while LinkedIn is better for targeting B2B buyers. Highlight different product benefits, such as saving time, increasing revenue, or simplifying tasks, to appeal to diverse buyer priorities.
Maximize Content with myAtlasLab
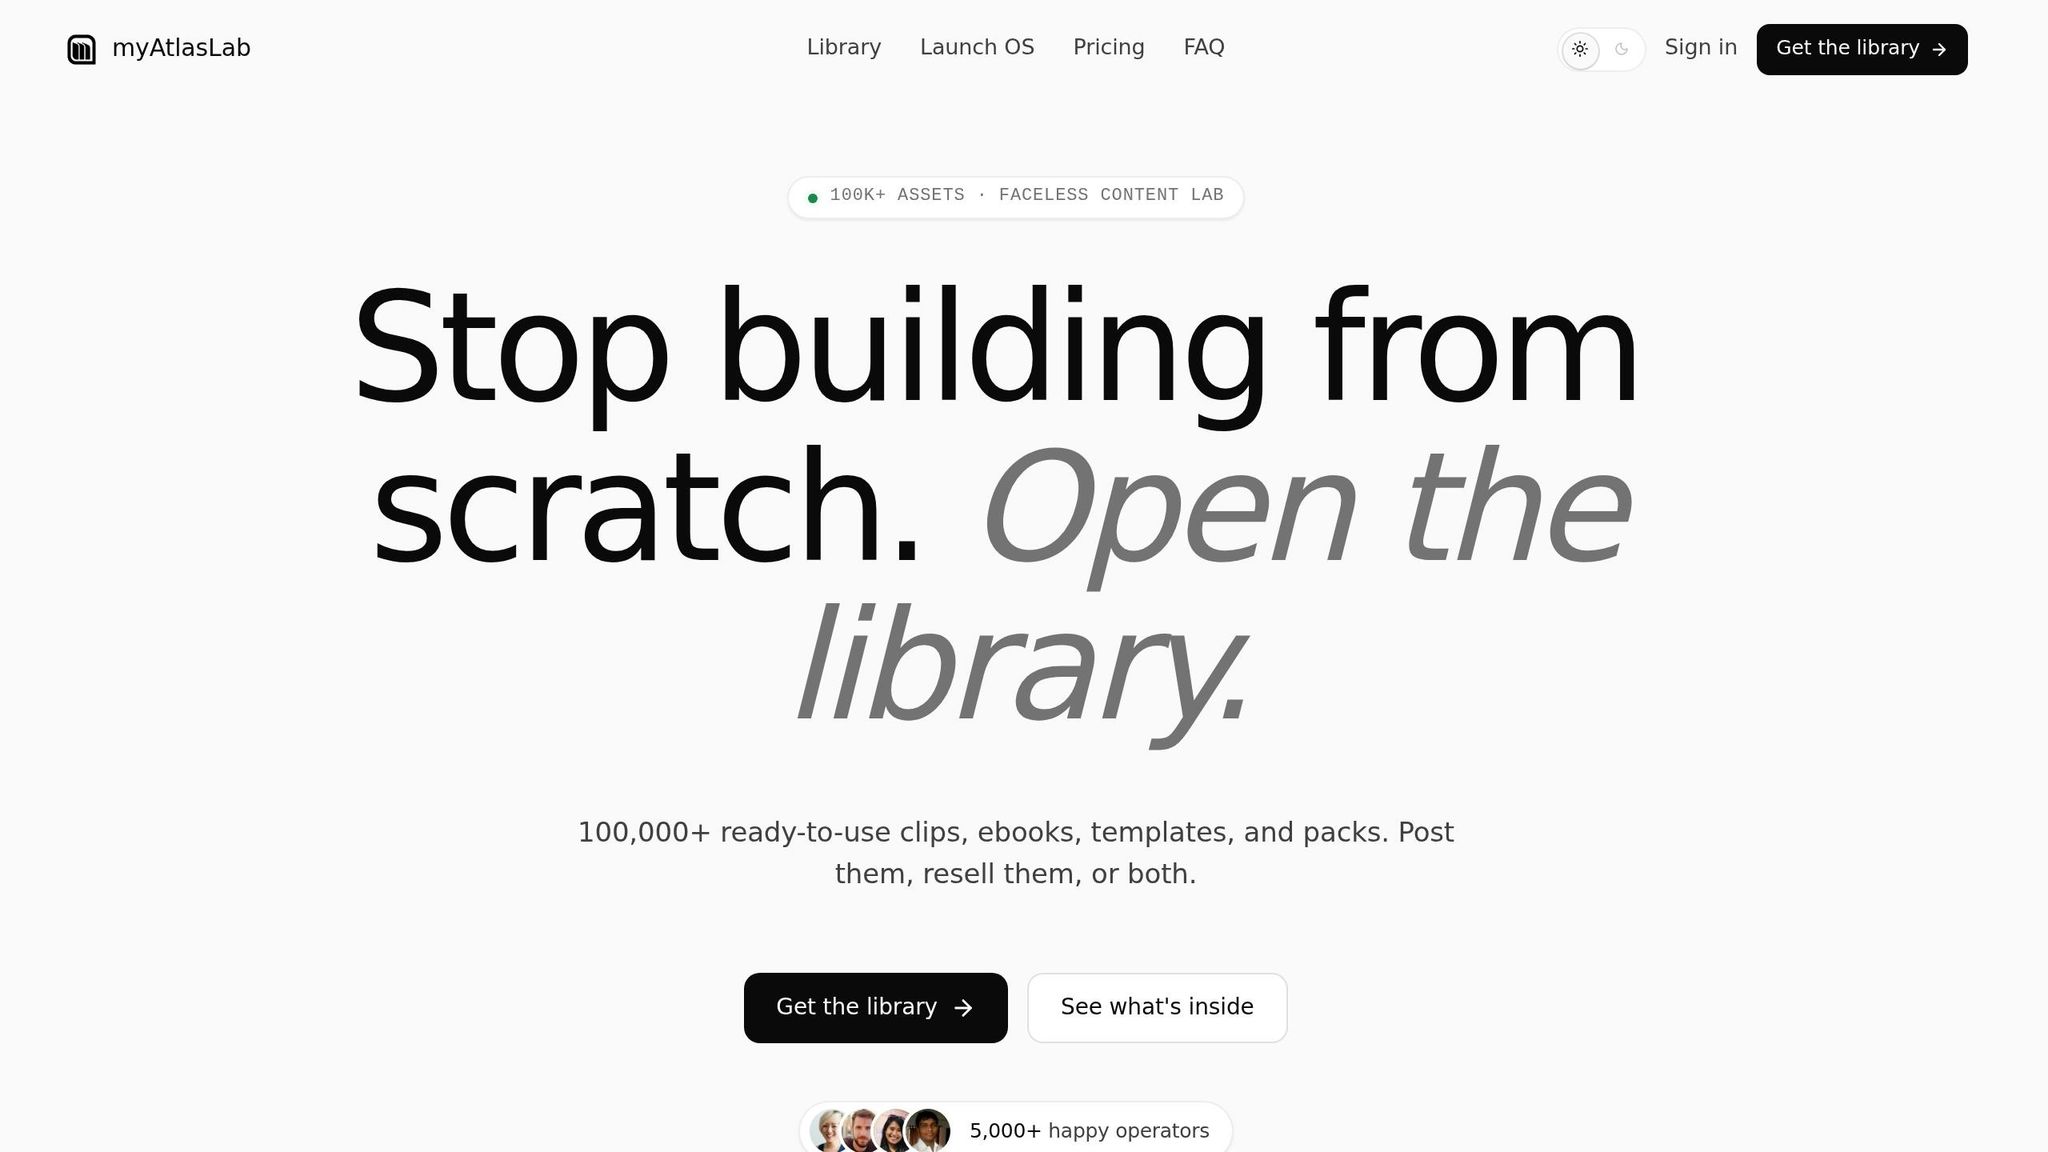
Creating fresh content for every platform can be overwhelming. Instead, start with a "pillar" asset - like a product demo video - and repurpose it across multiple formats. With myAtlasLab's content calendars, you can easily plan 15–20 posts during the pre-launch and launch periods, keeping your messaging consistent without scrambling daily.
myAtlasLab’s library of 4K video clips can boost your promotional efforts. For instance, explainer videos on landing pages convert two to three times better than text-only pages. Use longer demo videos to create short clips for Instagram Reels, TikTok, or YouTube Shorts. Adding behind-the-scenes footage or founder-perspective clips can also make your campaign feel more genuine. If you're a solo entrepreneur, myAtlasLab's Pro Lifetime plan offers premium 4K/ProRes assets and AI tools to simplify content creation and repurposing.
Step 8: Improve Your Product Based on Feedback
Launching your product is just the beginning. The real challenge - and opportunity - lies in constantly improving it. Businesses that thrive are those that actively listen to their customers and make meaningful changes based on what they hear.
Track Metrics to Identify Areas for Improvement
One effective way to evaluate your product's success is by using the Sean Ellis Test. This involves asking your active users a simple but powerful question: "How would you feel if you could no longer use this product?" If at least 40% respond with "very disappointed", you're likely hitting the mark with product-market fit.
To gather feedback efficiently, focus on methods that encourage high response rates. In-app surveys, triggered while users are actively engaging with your product, tend to outperform other methods like email. For example, in-app modals typically achieve response rates between 15% and 35%, while email surveys often struggle to reach even 8%.
| Feedback Channel | Response Rate | Best For |
|---|---|---|
| In-app modal | 15%–35% | First-time validation, high-quality signal |
| In-app widget | 8%–25% | Ongoing monitoring after launch |
| Email blast | 4%–12% | Large user bases (1,000+ active users) |
| External link | 2%–8% | Not recommended - too much friction |
By systematically collecting and analyzing feedback, you'll not only improve your product but also refine your overall strategy for digital success.
Adapt Your Product and Messaging Based on Feedback
Once you've identified areas for improvement, it's time to act. Pay close attention to users who are "somewhat disappointed." These individuals already see value in your product but need a few tweaks to become loyal advocates. Addressing their concerns can significantly enhance your product-market fit.
A great example of this approach comes from Superhuman. CEO Rahul Vohra found that only 22% of users would be "very disappointed" without the product. By focusing on the friction points these users experienced, the team raised that score to 58% within just a year. This same principle applies to your marketing efforts - use the language of your most engaged customers to fine-tune your landing pages and email campaigns.
"Job's not finished when it's shipped. Job's finished when you closed the feedback loop." - Thibaut Nyssens, Senior Solutions Engineer, Atlassian
Make it a habit to reassess your product-market fit every 6–8 weeks after implementing updates. This regular check-in ensures you’re staying on track and continuously improving both your product and your marketing strategy.
Step 9: Scale Your Digital Product Business
Once you've fine-tuned your product based on feedback and established consistent sales, it's time to focus on growth. Scaling isn't about working harder - it’s about creating systems that handle the heavy lifting for you.
By building on your validated product, you can expand your offerings and streamline operations for long-term success.
Add New Products and Bundles
One of the easiest ways to grow revenue is by selling more to your existing customers. Use your current product lineup to introduce bundles or cross-sell related items. Bundling products can be incredibly effective, with some studies showing they outsell individual offers by a 3:1 ratio.
"The reason I keep coming back to this model is simple: you build the thing once, and then it keeps working while you focus on the next problem." - Alex Berman
Automate Recurring Tasks with Systems
Repetitive manual tasks can eat up valuable time. Instead, use automation tools to simplify your operations. For example, connect your payment gateway with your email platform for instant product delivery. Set up a three-email sequence to recover abandoned cart sales. On the customer service side, a well-designed FAQ page and chatbot can automatically handle 70–80% of common inquiries. Documenting repetitive tasks as Standard Operating Procedures (SOPs) also ensures consistency when delegating work.
"A million-dollar digital product business is not an 'upload and hope' hobby. It is a real business with real systems." - Sense Central
Leverage myAtlasLab for Long-Term Growth
One of the biggest challenges in scaling is keeping up with the demand for fresh content. This is where a tool like myAtlasLab can make a difference. It provides access to over 100,000 ready-to-use assets across 50+ niches, including rebrandable ebooks, templates, and HD/4K video clips. These resources allow you to expand your product line without having to start from scratch. Plus, weekly content updates keep your library fresh, and full commercial rights ensure you can sell, bundle, or rebrand assets without worrying about licensing issues.
As your business grows, combining a tiered product ladder, automated systems for delivery and support, and a reliable content library creates a repeatable process. This approach makes scaling not only achievable but also efficient and manageable.
Conclusion: Next Steps for Launching Your Digital Product Business
Now that you've got the roadmap - covering idea validation, MVP creation, pricing, launching, feedback collection, and scaling - it's time to take action. These 10 steps aren't about getting everything flawless right away; they're about getting started and building momentum.
It's easy to get stuck waiting for everything to feel perfect, but here's the truth: the digital market is thriving. A striking 73% of consumers now favor digital solutions over physical products for learning and productivity tools. The demand is there, and the sooner you step in, the sooner you'll see results.
"A map only works if you walk." - Sense Central
Start small. Begin with a minimum viable product (MVP) - whether it's a checklist, template, or short guide - and share it with actual buyers. This approach allows you to refine your messaging and improve your product based on real feedback. It’s not about launching the perfect product; it’s about launching, learning, and improving.
As you gain traction, keep refining your strategy and expanding your offerings. Tools like myAtlasLab's library and Launch OS can help you streamline the creation process, saving time and accelerating your path to profits. And don't forget, you're stepping into a $9.8 billion digital products market. The opportunity is massive, but it all starts with that first step.
FAQs
How do I know my idea is truly validated?
Validation happens when there’s clear, measurable evidence of demand. This could be people paying for similar solutions, actively searching for answers online, or talking about the issue in niche communities. Key indicators include successful pre-sales, landing pages with conversion rates between 5–10%, or recurring complaints and discussions in places like Reddit or Discord. The focus here is on actions, not opinions.
What’s the fastest digital product to launch first?
The fastest digital products to get off the ground are straightforward, one-time purchase items that solve a specific problem. Think checklists, templates, spreadsheets, Notion dashboards, short PDF guides, or small workbooks. These types of products are quick to create - sometimes in just a few hours or over a weekend - and can be sold right away. This makes them perfect for testing your idea and generating income quickly, all without worrying about inventory or hefty upfront expenses.
How do I price my product without undercharging?
Instead of relying on cost-plus pricing, shift your focus to value-based pricing. This means setting your price according to the impact your product has - whether it's the transformation it offers, the time it saves, or the revenue it helps generate for your customers. Pricing solely based on the effort it took to create the product can lead to undervaluation.
Underpricing doesn’t just affect your profits - it can also make buyers question the quality of your offering. A price that’s too low might send the wrong signal, creating hesitation rather than trust. Instead, aim for what’s often called a "painless price" - a price point that feels like an easy "yes" to your customers while still reflecting the real value your product brings.